1. Editing in progress. There are a few pieces below but we are updating this page in due course to show more articles that have been published or written by our TEAM at INSPIRED TO SKI.
2. Parallel Skiing – Making Curves
Do you use the turn to slow down or change direction?
One of the biggest perceptions in skiing is how you use your skis to control your speed, e.g. slow down! In a car or on a bike we luckily have brakes but on skis there is not something that we can pull or press in order to say STOP !
When we first learn to ski we use a plough to help us slow down – our leg muscles help push the skis outwards, which brush the skis against the snow to help reduce our momentum.
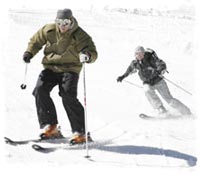
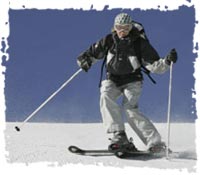
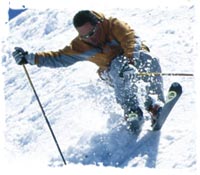
In parallel turns all so often skiers think that is by turning their skis this is what they use to slow down. If this is what you think then you need to change your perception of parallel skiing. THINK of using the turn shape to slow down, in other words allowing the skis to do what they are designed to do, make curve shapes. You then link these curves together, which gives you the perception of lovely ‘S’ shape turns down a hill, rather than ‘Zig Zag turns’.
TIP:Use the curve shape to control your speed and line.Link the curves together by changing the edges and therefore your direction.
3. Parallel Skiing – Shorter Turns
4. Hop Turns and Steeper Slopes
5. Off-Piste
6. Bumps

7. Tips for the Bumps
Tackling those ‘beasts of the piste’ is no easy task. All to often skiers attempt to battle the bumps, tackling what they can but never quite knowing where to start or how to achieve their perfect descent.
Picking up too much speed, unable to control your line, being thrown out of the troughs and ruts, are the memories and images that so many skiers have of these mountainous moguls. When things get tough it seems easier, and possibly essential, to revert to traversing across the bumps, quickly hopping or stepping the skis to change direction until you reach the bottom, or aiming for the easier flatter terrain to the side of the slope, leaving these beasts for the younger, more athletic skier to tackle and for those who have stronger knees!!
So, what’s the magic behind skiing the bumps?
Sadly, there is no magic!
Perceptions of how you think you should tackle bumps, a technique that could be practised to help or just the confidence to take a particular route may be the inhibiting factors behind the magic you see others perform. With some sound fundamental tools and the confidence to take these tools into the bumps, it will be fun, rewarding and you’ll be searching the mountain for the slopes where you can practise your newly acquired skills.
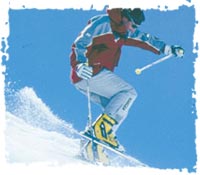
Here are some visual clues and tips of how to make your descent more successful and fun, allowing you to take the fall-line, the straight line down the slope rather than the straight line across it!
PIVOT ON THE LINE
AIM: To keep your feet on this line whilst still travelling down the hill making rhythmical curves.
PRACTISE: On pisted, shallow slope, then take it into some shallower bumps.
TIP: Keep the thighs open, remember to pivot and turn the inner leg as much as the outer leg.
IMAGINE: There is a red line directly down the slope.
FEEDBACK: Don’t rush the action, let the legs and feet unwind so the skis face down the fall-line as you pivot the legs from one turn to the next.
Try the same action on some shallow bumps – think about the red line!
POLE PIVOTING
AIM: Learn to use the pole in the bumps.
PRACTISE: Shallow slope or bumps.
TIP: Allow the pole to take your body weight as you lose the support of the lower ski.
IMAGINE: Planting your pole in a cup of a golf hole. Push down on the pole as you try to turn your legs and skis around it.
FEEDBACK: If you are having difficulty turning the upper ski, rock off the edge so the ski goes flat to help you pivot.
Keep the arm strong and think of pushing down on the pole.
CHECK YOUR SPEED
AIM: Check and reduce your speed on the steeps and bumps.
PRACTISE: Pisted slope to start with, take it into some shallower bumps
TIP: The ‘check’ happens at the end of one turn before the beginning of the next. Aim for the back of the bump to check and pole plant.
IMAGINE: Imagine stubbing out a cigarette with the naked heel of your foot but act quickly as it’s still HOT!
FEEDBACK: Keep the leg you are checking with soft, don’t allow it to straighten or block at the ankle.
POCKIT INSTRUCTOR QUICK TIPS, A FEW INSERTS FROM:


